Contact Management
Parks & Rec > Contact > Search > Edit
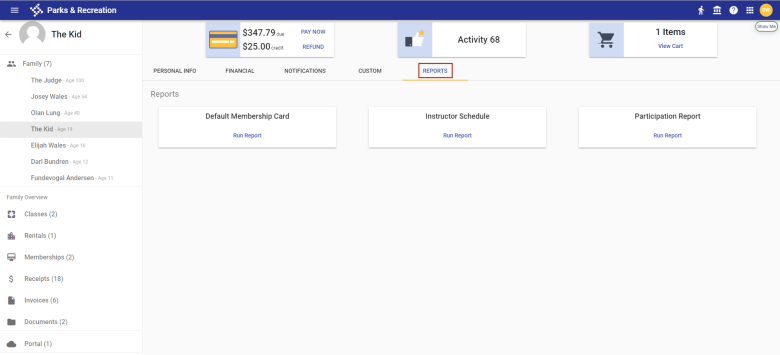
Contact Management lets you view and manage class registrations, rentals, memberships, invoices and all other information for the selected contact and the contact's family members from the same page:
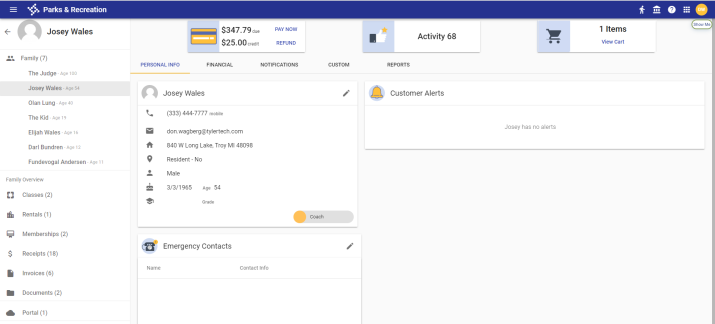
The cards at the top of the right panel show an overview of the family's account, Parks & Rec activity level and shopping cart items:

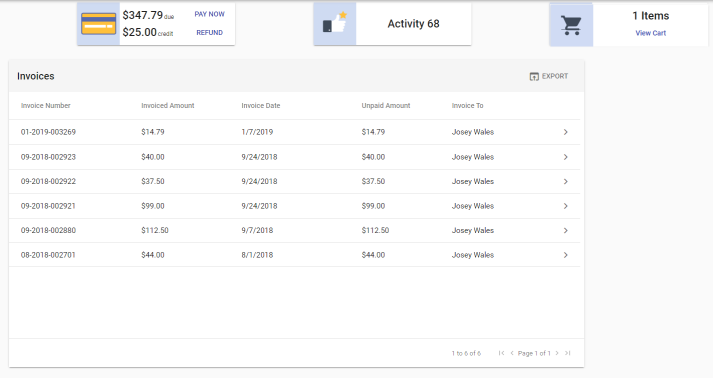
Clicking the PAY NOW button loads open invoices in the right panel, showing the invoiced amounts, dates, unpaid amounts and payers:
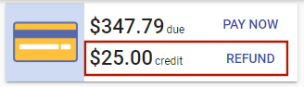
If the family has a credit, it appears as a separate line under the amount due:
Clicking the REFUND button opens a dialog that gives you the option to issue a refund. After the refund is issued, another dialog opens to say the credit balance for the family has been reset:

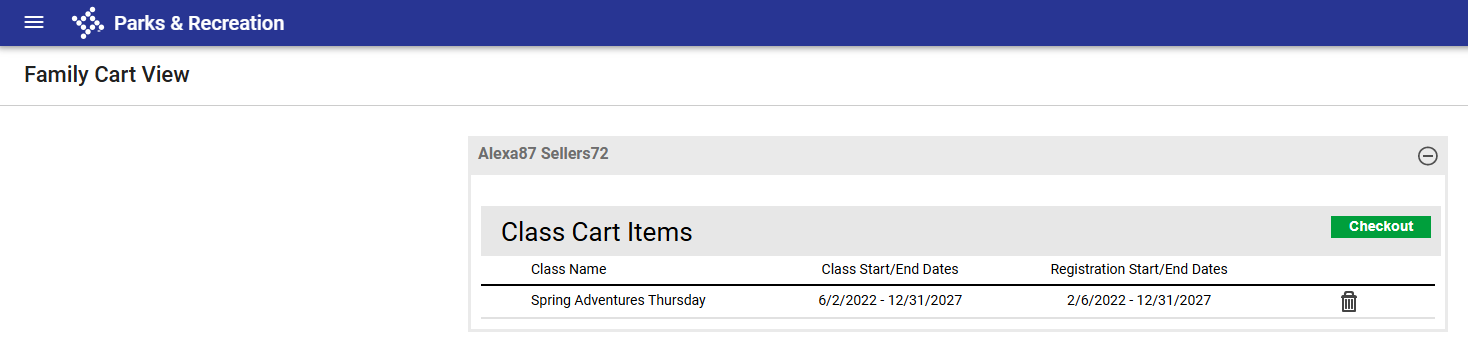
Clicking the View Cart button on the shopping cart card lets you continue checking out items from a cart that was started from the citizen portal:
The left panel of a family member's page shows a list of other family members, with options to view classes, rentals, memberships, receipts, invoices, documents and portal accounts associated with the family. The total number of items for the family appears in parentheses next to each option:
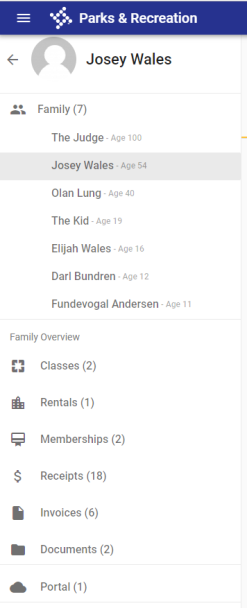
Note: All immediate family members associated with a contact prior to release 2019.3 will appear under the Family heading in the left panel.
You may select any of the items in the left panel to view details in the right panel. Regardless of the family member selected, the list of family members remains visible at all times for quick, easy selection.
Selecting the Family heading loads the right panel with a list of all family members and, if applicable, a list of other relationships below it:
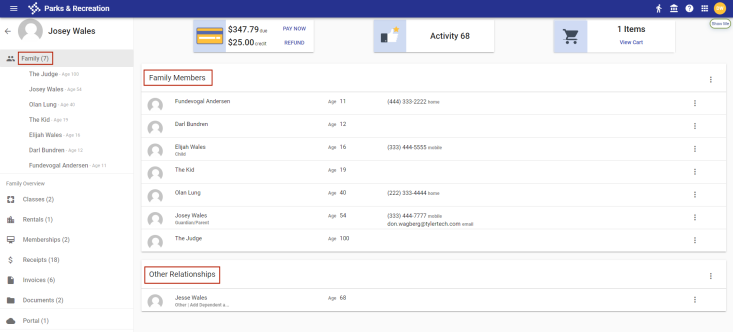
To add a new or existing family member, click the vertical ellipsis  on the far-right side of the Family Members header. A menu displays, giving you the options to Add New and Add Existing:

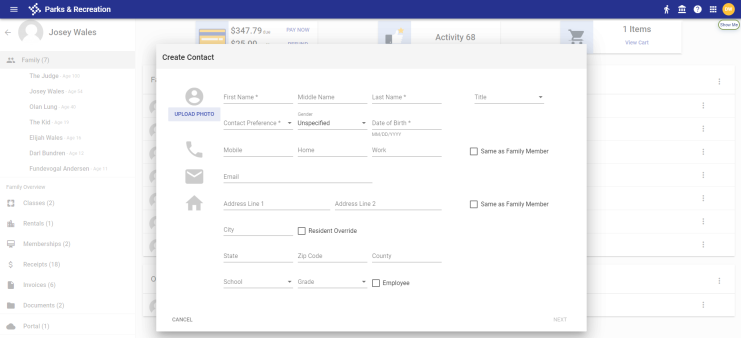
The Add New option opens the Create Contact dialog:
The Title selected appears below the family member's name on the Contact Management page:


For existing customers, if conflicting titles appear in the data migration process for release 2019.3--for example, a member is a child in one relationship and a guardian/parent in another, the title displays as Family Member below the name.
When adding a family member, if you want the member to inherit phone and email or address information from another family member, select the Same as Family Member check box to the right of the information to be inherited. A Family Member field displays below the check box. Select the family member from the drop-down, and the information auto-fills the appropriate fields:
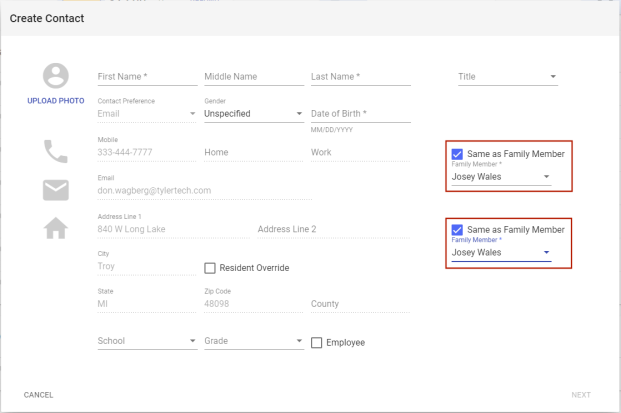
Note: If the family member whose information is being inherited has a citizen portal account, the member's email address is not inherited and the field remains enabled, since only one email address per portal account may be used.
Note: Subsequent edits to the inherited family member's information are applied automatically to the new family member's information.
The Add Existing option opens the Add to Family dialog. Select the family member from the Contact drop-down and click SAVE:
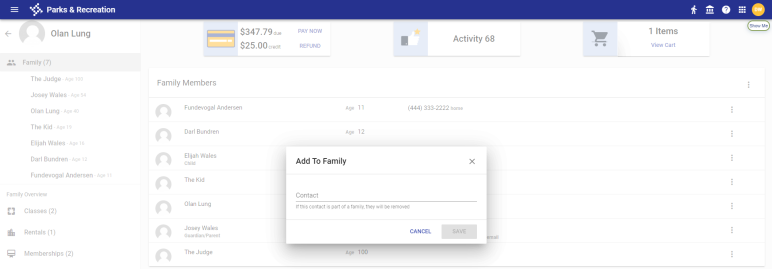
Note: A contact who is part of another family will be removed from that family and added to the current family.
To remove a family member, click the vertical ellipsis on the far-right side of the family member's row. A menu displays, giving you the option to Remove from Family:

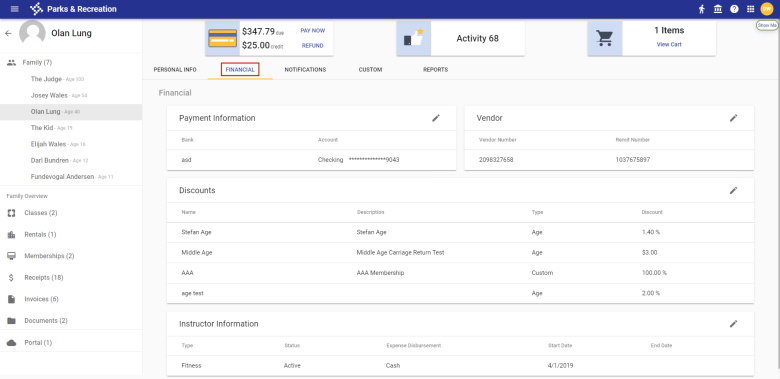
Selecting a family member in the left panel loads his or her information in the right panel, segmented by the following tabs: PERSONAL INFO, FINANCIAL, NOTIFICATIONS, CUSTOM and REPORTS.
This tab contains separate cards showing the family member's personal information, alerts and emergency contacts:
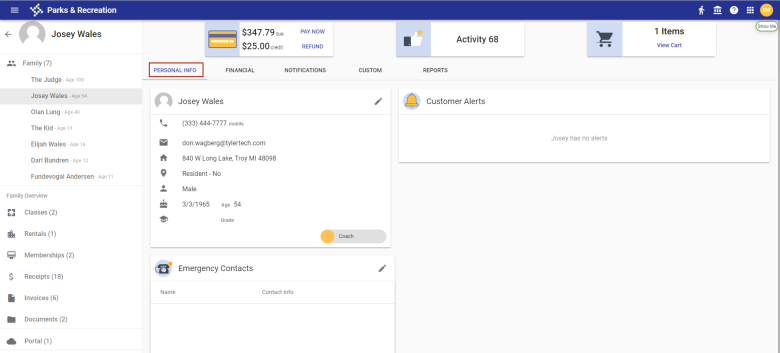
Clicking the email icon next to the email address opens an email from the user's default email client addressed to the name on the link.
If the family member is an employee, instructor or coach, corresponding buttons appear at the bottom of the main card:

If the family member is active in the role, the button shows in yellow; inactive, it shows as gray.
To edit personal information, click the pencil icon  in the top-right corner of the family member's main card. The Edit Contact dialog opens:

The Emergency Contacts card contains a family member's active emergency contacts, with the primary contact appearing at the top of the list:
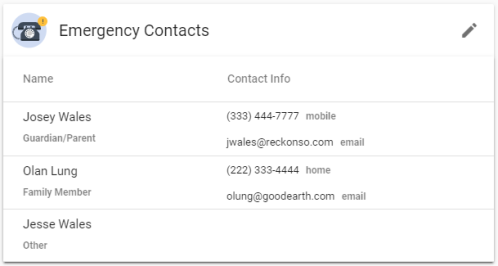
Note: An emergency contact must have a phone number assigned.
The primary phone and email address shows to the right of each contact's name. If a contact has more than one phone number on file, click the chevron  to expand the contact's row and view the additional number(s).
To add, remove or change the status of a contact, click the pencil icon in the top-right corner of the card. The dialog that opens contains a list of family members and those designated as other relationships who are 18 or older and available as emergency contacts:

Any row containing an inactive emergency contact is shaded gray. To update the status of an emergency contact, click the vertical ellipsis on the far-right side of the contact's row. A menu displays, giving you options to make the contact Primary, Secondary, Additional or None (Inactive):
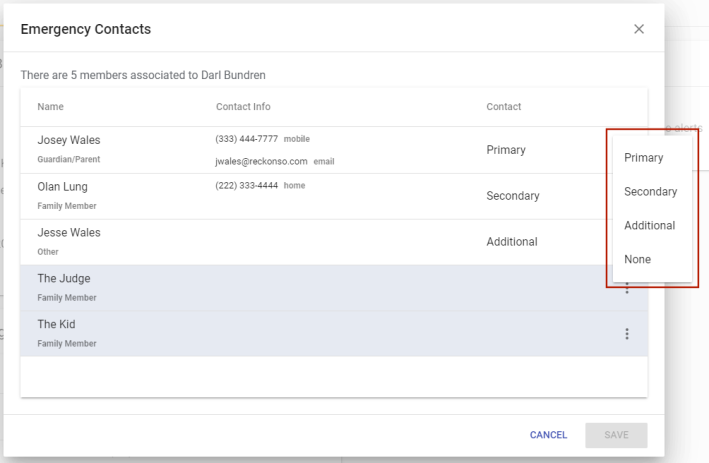
After you save the change, anyone selected as a primary contact is moved to the top of the list.
This tab contains individual cards showing payment, vendor, discount and instructor information:
To edit information an any card, click the pencil icon in the top-right corner of the card.
The Payment Information card shows the family member's bank and account used for payments:
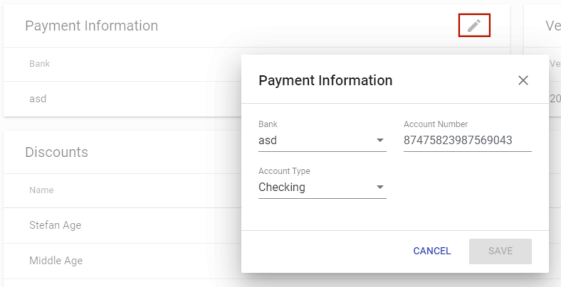
After you save an account number, it is masked up to the last four digits on the FINANCIAL tab.
Payment information allows ACH setup for the auto-renewals of memberships.
The Vendor card shows the family member's vendor number and remit number:
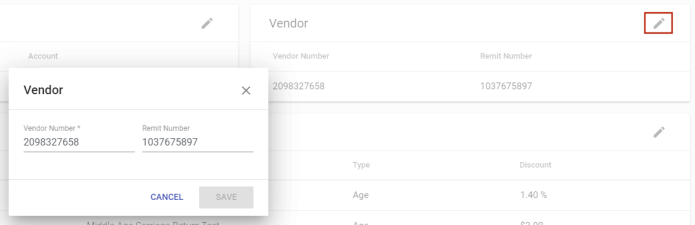
Vendor information helps with exports to Tyler financial systems.
Only discounts that have been applied to the family member appear on the Discounts card.
Using the check boxes, you may select and clear custom discounts on the edit dialog:
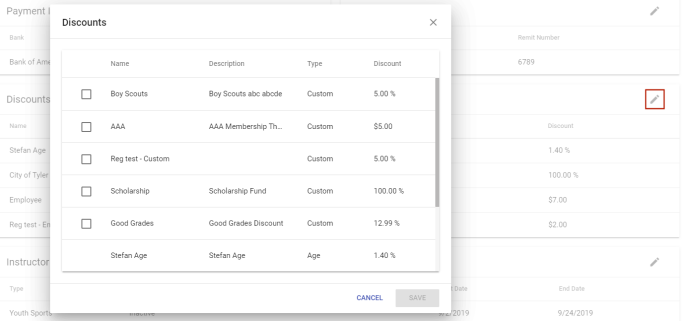
Check boxes do not appear next to non-custom discounts that already have been applied.
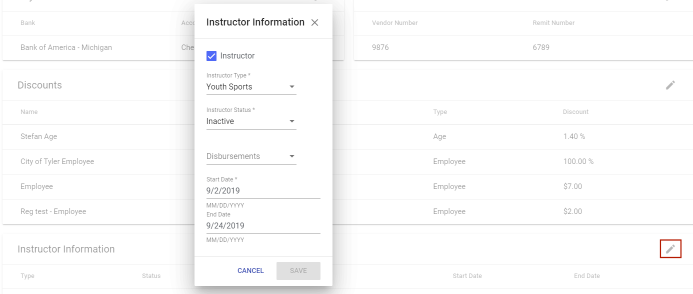
The Instructor Information card shows the instructor type, status, expense disbursement, start date and end date:
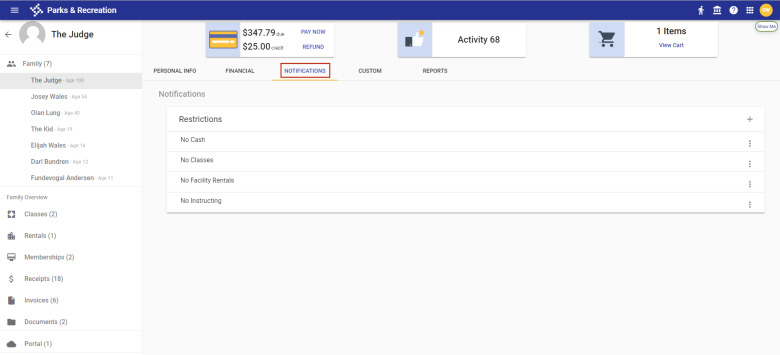
This tab contains restrictions and associated comments that have been applied to the family member:
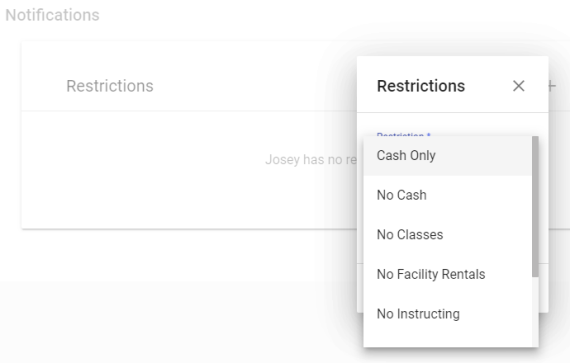
To add a restriction, click the plus sign (+) in the top-right corner of the Restrictions card. A Restrictions dialog displays:
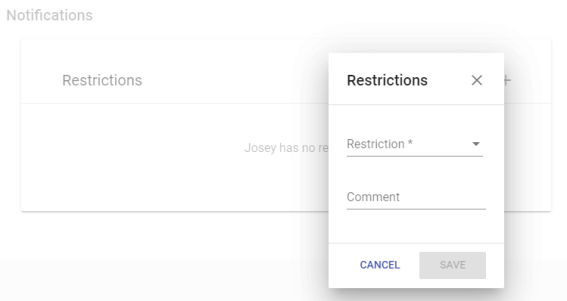
Select the applicable restriction from the Restriction drop-down, and type a Comment if necessary:
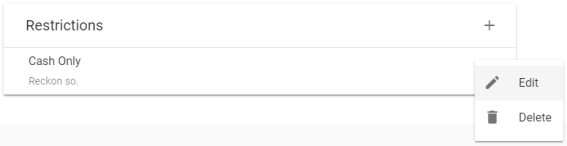
To edit or delete a restriction, click the vertical ellipsis on the far-right side of the corresponding row:

Note: Set up restrictions at Administration > Parks & Rec. Setup > Restrictions.
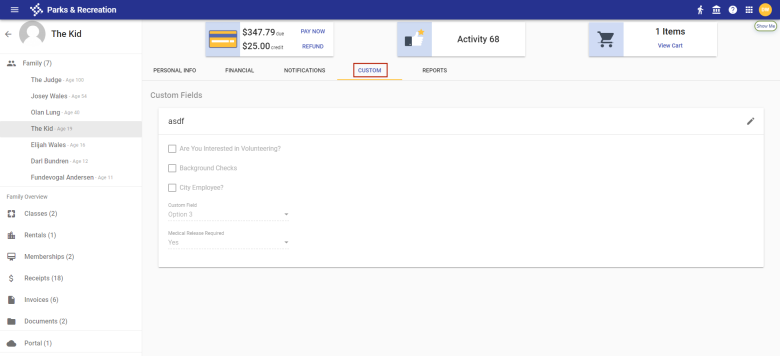
This tab contains fields that have been created in Administration to manage additional activity, team or rental information. Fields are grouped on individual cards corresponding with the tab names selected in Custom Field Layouts (Administration > Parks & Rec. Setup > Custom Field Layouts):
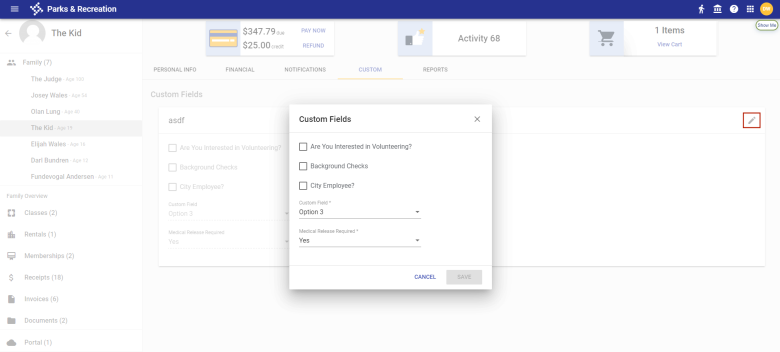
To edit information an any card, click the pencil icon in the top-right corner of the card:
This tab gives you options to run the Default Membership Card, Instructor Schedule and Participation reports:
Sample Participation Report
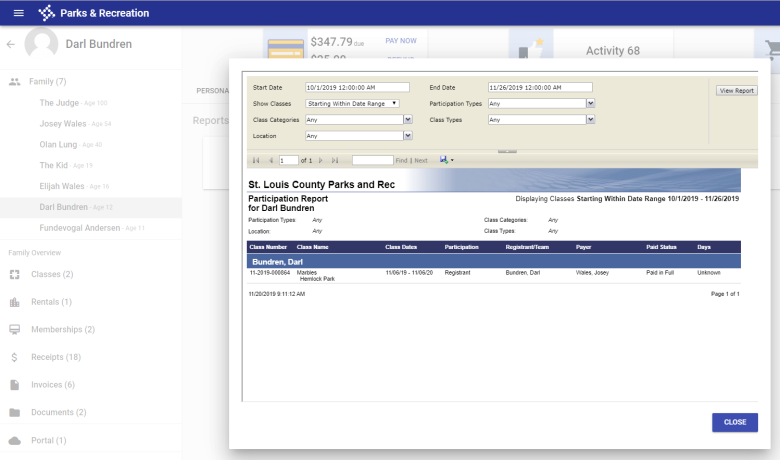
These reports used to be on the Documents tab of the former Contact Details page.
The Classes tab shows class registrations for each family member. To view active classes only, clear the Show History check box in the top-right corner:
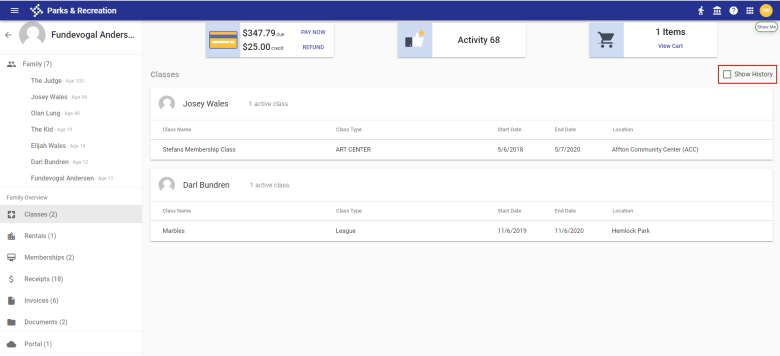
The number of active classes displays to the right of the family member's name.
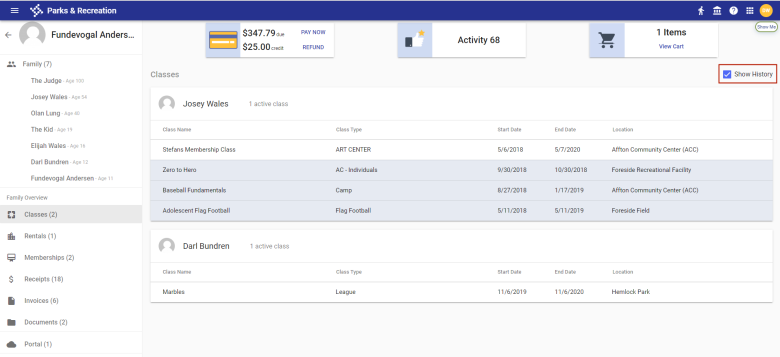
To view past classes, select the Show History check box. Past classes are shaded gray:
The Rentals tab shows rental registrations for each family member. To view active rentals only, clear the Show History check box in the top-right corner:
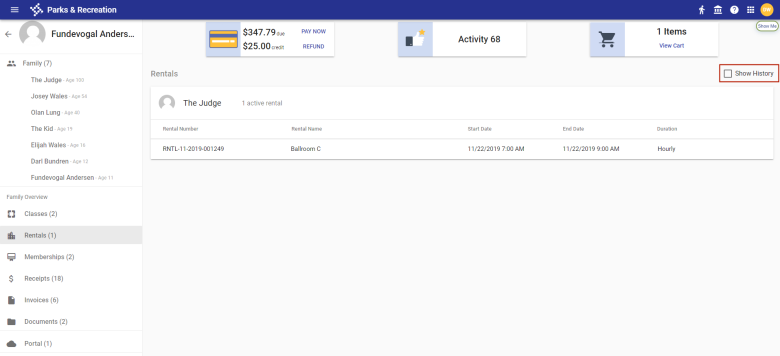
The number of active rentals displays to the right of the family member's name.
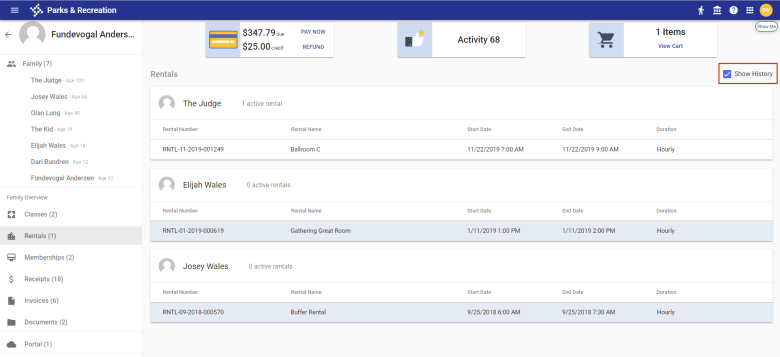
To view past rentals, select the Show History check box. Past rentals are shaded gray:
The Memberships tab shows memberships for each family member. To view active memberships only, clear the Show History check box in the top-right corner:
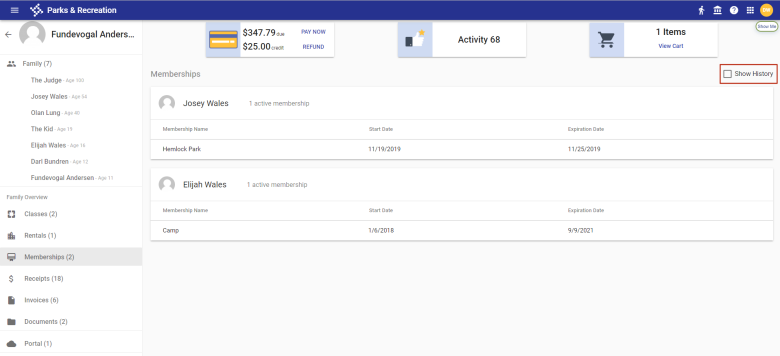
The number of active memberships displays to the right of the family member's name.
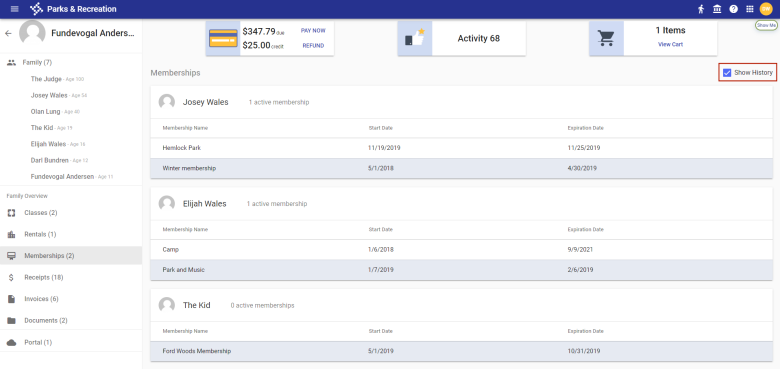
To view past memberships, select the Show History check box. Past memberships are shaded gray:
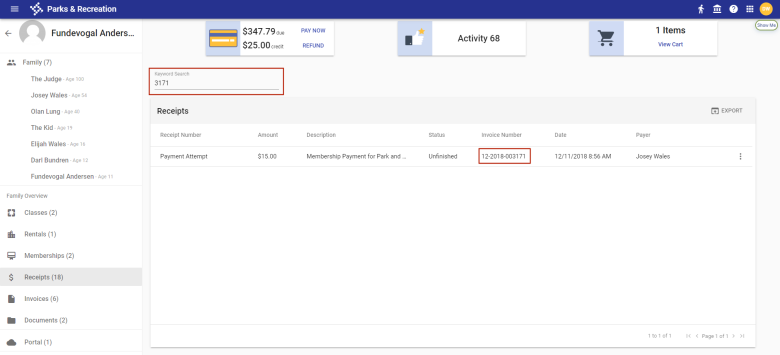
The Receipts tab shows all receipts for a family:

Use the Keyword Search field to find a particular receipt:
To export the receipts to Excel, click the EXPORT icon on the far-right side of the Receipts header.
To email or print a receipt, click the vertical ellipsis on the far-right side of the receipt row:
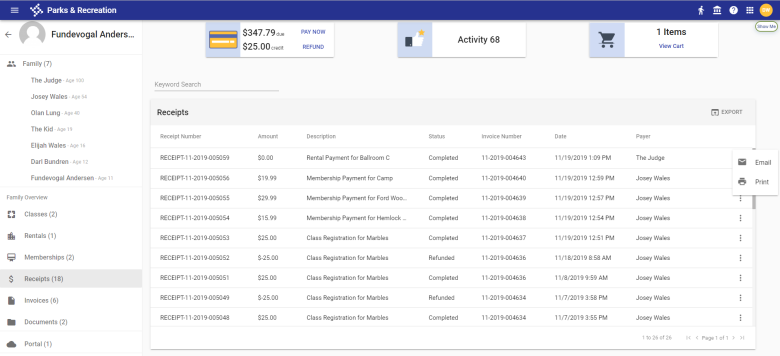
Receipts used to be on the Transactions tab of the former Contact Details page.
The Invoices tab shows all invoices for a family:
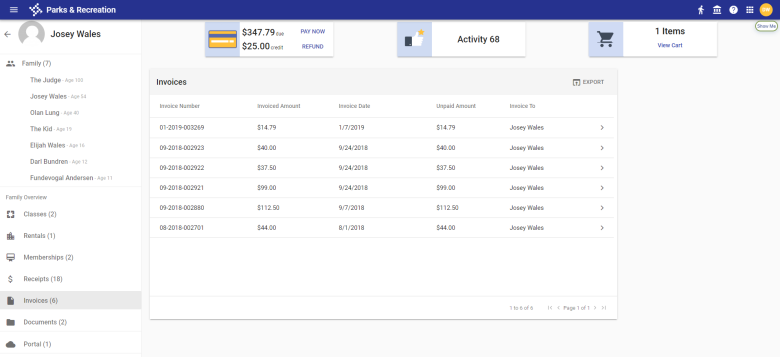
To export the invoices to Excel, click the EXPORT icon on the far-right side of the Invoices header.
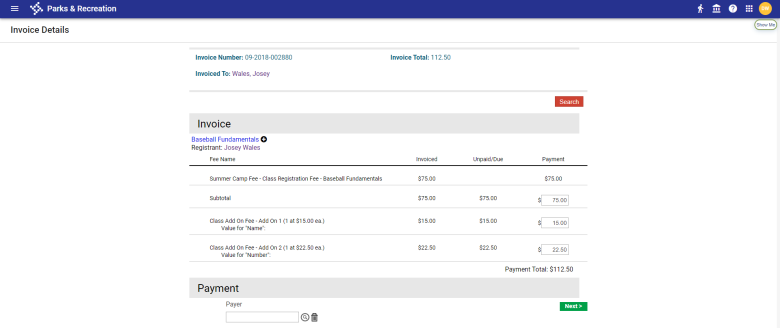
To view or edit the details of an invoice, click the chevron  on the right side of the invoice row. The Invoice Details page opens:
The Documents tab contains documents that have been uploaded for each family member:
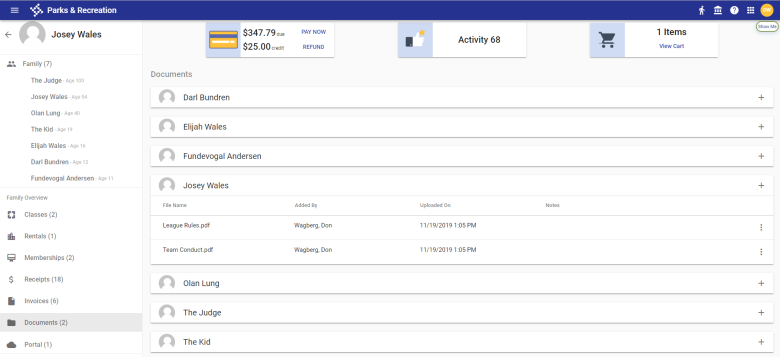
To upload a document for a family member, click the plus sign (+) in the top-right corner of the member's card.
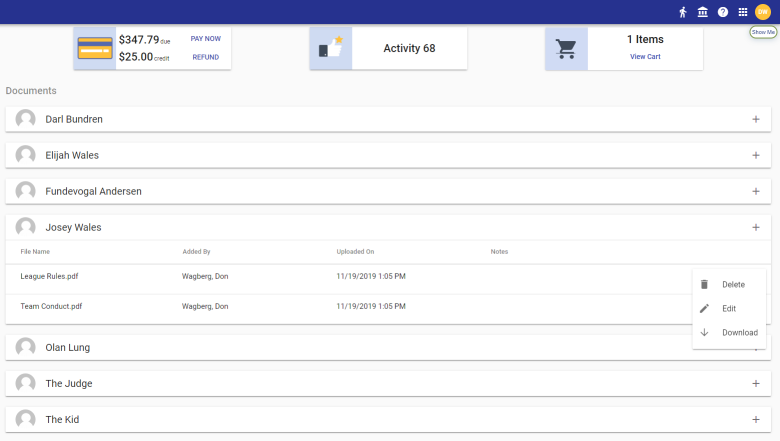
To delete, edit the title or download a document, click the vertical ellipsis on the far-right side of the document row:
The Delete option opens a delete confirmation dialog:

The Edit option opens the Notes dialog:
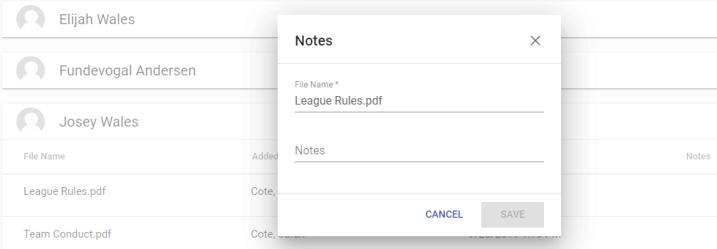
The Download option opens the document for viewing.
The Portal tab contains the names, email addresses, activation dates and last logins of family members who have portal accounts:
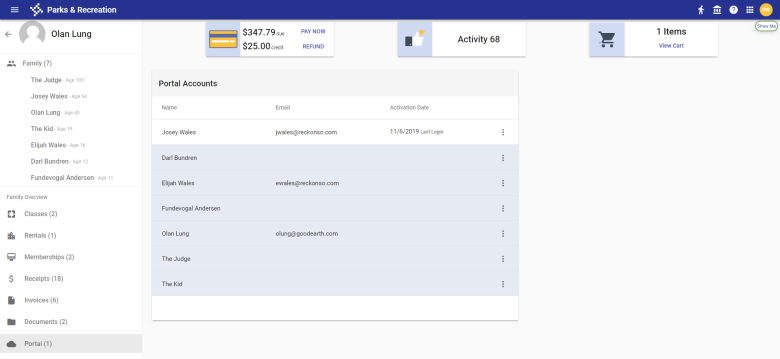
The rows of family members who do not have portal accounts appear in gray. Clicking the vertical ellipsis on the far-right side of a member's row opens a menu with an option to create a portal account:
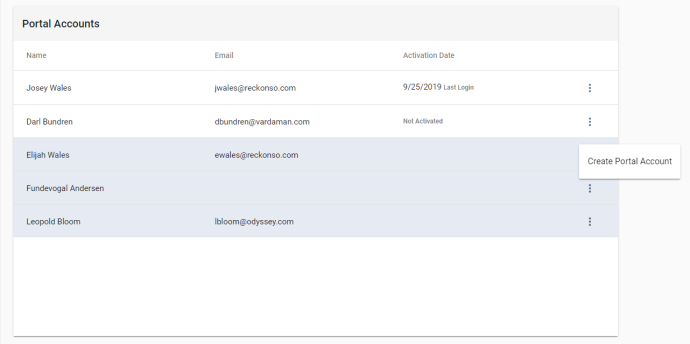
If an account has been created but has not been activated, Not Activated shows in the Activation Date column.
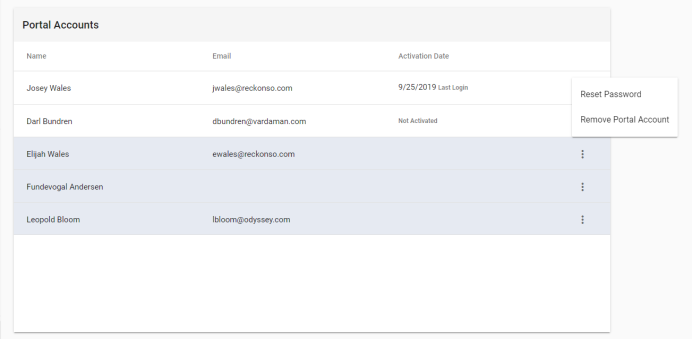
To reset a family member's password or remove the portal account, click the vertical ellipsis on the far-right of the member's row:
Note: If an existing contact does not have a citizen portal account, creating a contact from the portal with a matching name, email address and date of birth automatically merges the contacts. The merge occurs only after the contact authenticates with a temporary password delivered to the email address provided.